Repair errors on partition manually
Right click the partition which has errors and select "Advanced", and then choose "Check Partition". In the pop-up window, choose the first option: "Check partition and fix errors in this partition by using chkdsk.exe". Press "Win + R" on the keyboard.
https://wethegeek.com/setup-was-unable-to-create-a-new-system-partition/
#setup #partition #errors #windows #software #pc


In a word, once your disk becomes RAW format, it is not allowed to access the target partition.
You can find the RAW partition in the Windows built-in Disk Management utility.
You need to format the disk in drive X before you can use it.
Do you want to format it?
The type of file system is RAW.CHKDSK is not available for RAW drives.https://wethegeek.com/convert-raw-to-ntfs-without-losing-data/#raw #disk #files #drive #windows #disk #management #computer #system
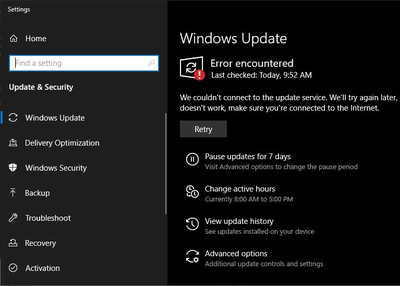
There often occurs an error with code 0xc8000247 on Windows software that prevents users from installing any new update with the Windows update component.
There are reports by users that show that error only occurs in installing certain updates.
On the other hand, the error mostly occurs on Windows 7 t. So if you face the same error on your Windows PC or laptop, then you have come to the right place.
Go through the methods below and fix this 0x8000247 error on your Windows system.
And to run this troubleshooter, follow the steps listed below:
Press Windows Key + R to open up the Run dialog box.

This error usually suggestions that the Windows attempts to communicate with the Microsoft servers have been unsuccessful.
Hence, log out of your account and check if the issue of Cortana something went wrong error still persists.
Here’s what you need to do:Open the Start menu.Select the user icon.Now, click on the Sign Out option.After that, log back into your Microsoft account.Hopefully, doing this will fix the Cortana issue.Fix 3: Select the same languageIn order to interact with Cortana, you have to give her commands.
Hence it is suggested that you choose the same device and speech language along with the country or region language.For changing the languages, here’s what you need to do:Open the Start menu.Click on the Settings option.Select Time and Language.Click on Language and then select any supported language for Cortana below the Windows display language.Click on Region and make sure that it is supported.Now, just go to Speech and see if the Speech language is the same as Cortana language.Fix 4: Select a different Cortana languageEven if the device language and speech language are the same, and you are still facing the Cortana something went wrong error, then you must go to the Cortana settings and change its language to a supported one.Just follow the steps given below:Open the Start Menu.Select Settings.From the Settings screen, select Cortana.Or else, you can click the search option and select the settings icon.Move to Talk to Cortana.Now, you can change the language.Fix 5: Run the troubleshooterWindows comes with an inbuilt troubleshooting tool that can fix many issues.
Here’s how you can troubleshoot the Cortana issue:Launch the Start menu.Hit the settings option located in the left section.Select Update and Security.Go to the Troubleshoot section.Select Search and Indexing.Now, click on Run the troubleshooter.Follow the guidelines shown on the screen to begin the troubleshooting procedure.
This will bring the directory of all available Troubleshooter.

Nowadays, many users have visited in Windows Store app as it lets Windows users to easily download all free and paid applications like music files and Windows operating systems updates.
However, Several Windows users experience many Windows Store app related glitches and errors such as apps cannot be downloaded, the install and download process might congeal the computer; the Windows store app does not opened it and many more.Therefore, the Windows Store error code 0x8000FFFF occurred after the configuration of the Windows Updates and this error utterly locks the Windows Store.
But sometimes, this error occurs when any user tries to set up a newly downloaded app.Before start troubleshooting the error code 0x8000FFFF, you need to ensure that your system files are working appropriately, your computer system is up to date, and the app you download is compatible with your computer system.
Below we explain you few fixes or methods which help you in troubleshooting the Windows Store error code 0x8000FFFF.
Try to follow the below-given steps in ascending order to avoid trouble and damages.
The steps are discussed below.Steps to Fix Windows Store Error Code 0X8000FFFFMethod-1: Try to Run Apps TroubleshooterFirstly, click on the ‘Start’ tab.Type ‘Troubleshoot’ in the menu search box.Press the ‘Enter’ key.Now, from drop-down menu click on the “Windows Store Apps” option.After that, click on the ‘Run the Troubleshooter’ and wait until the scan finished.Finally, Windows should report, and the problem is found.Method-2: Reset the Windows Store CacheClick the Windows + S keys together on the keyboard to open the start menu.Then, type “wsreset” in the search box and right-click on it.After that, choose “Run as Administrator” option.Now, on the “User Account Control” section, click on “Yes” tab.Wait until the system is resetting the Store cache.After completing the process, if the Windows Store window launched it, this indicates that the cache has been automatically reset in your computer system.Now, Reopen the Windows Store and again try to download the desired files.If the steps mentioned above don’t help you in fixing the corrupted Windows Store cache and also not help you in troubleshooting the errors the follow the below-given steps to fix it:Click the Windows + R keys together to open the run command.Now, enter the below-mentioned command under the run dialogue box:%localappdata%\\Packages\\Microsoft.WindowsStore_8wekyb3d8bbwe\\LocalStateClick on the “OK” tab to implement the command.Now, look for the folder name “Cache,” right-click on it and choose ‘Rename’ option.After that, name that Cache folder as “Cache.old.”In any case, if you are unable to find the Cache folder, click to create it.

You can relax after having a tiring day by watching your favorite TV series.
In the middle of the video, your Windows Media Players may stop, and you get to view the C00D11B1 error stating ‘Windows Media Player encountered a problem while playing the file’.
This issue shall have you worried if you don’t know the method of troubleshooting it.
If you’re also getting the same error, then this blog is appropriate for you.The method of installing the Windows Media Player one more timeFirstly, restart your PC.Then, do a long press on the F8 button till you get the boot menu.After that, press the Start option.Next, choose Run.After that, go to the Run DialogBox, write ‘appwiz,cpI’ and tap Enter.Then, select Windows Media Player from the given list of program.Next, press on Remove or Uninstall.Then, follow the given steps from the uninstall wizard.After that, restart the device.Next, go to the MS site.Then, search for the installation guide for the Windows Media Player.After that, get the installer by downloading.Next, save it to the hard drive.Lastly, you need to run the installation program.The method of turning off UDP Settings Firstly, press the Start option.Then, choose All Programs.After that, select the Windows Media Player.
You need to select it from the given list of programs.
As a result, it shall launch the app.Next, go to the above menu and press on Tools.Then, choose Options.After that, go inside the Options DialogBox and visit the Network tab.Note that if the UDP square has a tick mark, then you need to clear the box by clicking on it.Next, tap on ‘OK.’Lastly, view if your issue has been solved.More To readHow to Fix Windows Defender Error Code 0x8e5e021fHow to Fix Wi-Fi Adapter After Installing Update KB4515384The method of having the perfect Proxy Settings Firstly, search for the perfect proxy settings on the MS site.Then, press the Start symbol.Next, choose Control Panel from the given options.After that, press on Tools.Then, view if each of the net and player options matches the data that you got by the MS site.Lastly, you need to correct the values if it does not match.The method of undoing recent changes with the help of Windows System RestoreFirstly, press on Start.Then, write ‘system Restore’ in the search bar.Next, tap on ‘Enter’.After that, choose System Restore from the given results.If asked, give any of the administrator passwords.Lastly, select a restore point according to the on-screen points given in the Wizard.Source : Fix: Windows Media Player Error C00D11B1?Alex Smith is a Microsoft Office expert and has been working in the technical industry since 2002.

1) Create Windows Restore PointHere are the steps on how to create windows restore point to fix Windows 10 Installation Upgrade Error 0xC1900101 – 0x20017:Tap and Hold Win + R key together.Then enter the following command given below:exeHit on the Create and enter the title of your restore point.Tap OK to confirm your creation.
2) Disabling wireless from BIOSHere are the steps on how to disable wireless from BIOS to fix Windows 10 Installation Upgrade Error 0xC1900101 – 0x20017:Restart your computer.While the boot tap, F2 or del button continuously to enter BIOS.Visit the Advance tab when that it did.Move to the Wireless section and tap on the Enter to start it.When two “internal Bluetooth and Internal WLAN” button appear or disable.Tap Esc key on the keyboard and return to the main display to save the change.
3) Reinstall or Update DriversHere are the steps on how to update or reinstall drivers to fix Windows 10 Installation Upgrade Error 0xC1900101 – 0x20017:Tap Windows key on your keyboard and enter “Device Manager.”Tap on the search result and find the malfunctioning drivers.It can be a label with a yellow exclamation sign, visit the list on your device and check one by one, all of them.Choose Driver and Tap on the Update Driver option.Reboot your system.
4) Uninstall Broadcom Bluetooth and Wireless drivers If you have operating Windows 7 or Windows 8.1 operating system, then the culprit might be Wireless drivers and Broadcom Bluetooth.Here are the steps on how to uninstall wireless drivers and Broadcom Bluetooth to fix Windows 10 Installation Upgrade Error 0xC1900101 – 0x20017:Visit the Start and enter Device Manager in the quest box.Tap on the search list and attain “Bluetooth driver.”Right-tap on Bluetooth driver and choose Uninstall.After that, search and right-tap on “Wireless network driver” and choose Uninstall.Again Reboot your system and attempt to install the update.
5) Restart Windows Update componentHere are the steps on how to restart Windows update component to fix Windows 10 Installation Upgrade Error 0xC1900101 – 0x20017:Tap Win+X key together and choose “Command Prompt.”Disable BITS, Windows Update Services Cryptographic, and MSI Installer.To start, type the command on the prompt and tap Enter button on each of them as net stop bits net stop cryptSvc, net stop wuauserv, and net stop msiserver.Now type the command to rename ” SoftwareDistribution” and “Cartoot2 solders, and remember to Enter after each command as follow:C:\\Windows\\SoftwareDistribution SoftwareDistribution.old and renC:\\Windows\\System32\\catroot2 Catroot2.oldWhen you have done, enable BITS, Windows Update Services Cryptographic, and MSI Installer service.The given command can do this by Entering one by one: net stop bits net stop cryptSvc, net stop wuauserv, and net stop msiserver.Now close the Command Prompt and restart your computer.