


Read this article to find out how to recover lost data from your Linux operating system after reinstalling it or formatting the hard disk. How to install VMware on Linux, how to configure it, and how to create a Windows 10 virtual machine.
Almost every novice user knows how it feels to lose data after reinstalling the operating system. You may have forgotten to copy important information from the system disk before you start the reinstallation process, and now all that data is gone. Everyone knows that bitter feeling of trying to find important data and discovering is doesn’t exist anymore. Fortunately, there are many solutions nowadays that can help you get your data back. One of them is Hetman Partition Recovery, a well-tried and reliable utility globally recognized for successful data recovery.
At the moment, there is no special distributive for Linux, so this article contains directions on how to run this application on Linux and how to use it to recover data from Linux partitions.
How to install VMware on Linux
To make Hetman Partition Recovery work in this environment, we need a virtual machine with a Windows OS. Currently, a specialized version of Hetman Partition Recovery for Linux is not available, but the existing version for Windows can recover files from Linux disks as well. It supports almost every file system used in Linux. This program recovers data from devices working with such file systems as FAT/exFAT, NTFS/ReFS, APFS/HFS+, Ext2/3/4/ ReiserFS and XFS/UFS.
To run it on Linux you need a virtual machine with a Windows OS, and you can create one with the help of another application, VMware. This is one of the most popular virtual machines, and you shouldn’t have any difficulty installing it. VMware is not distributed with open source code, but it comes in two variants – a commercial Pro version and a free version with basic functionality. The Pro version has a trial limitation of 30 days, and that should be enough to recover the lost data.
In this tutorial, I’ll describe how to install VMware, create a virtual machine with Windows 10 and recover your lost data from Ubuntu version 18.04.
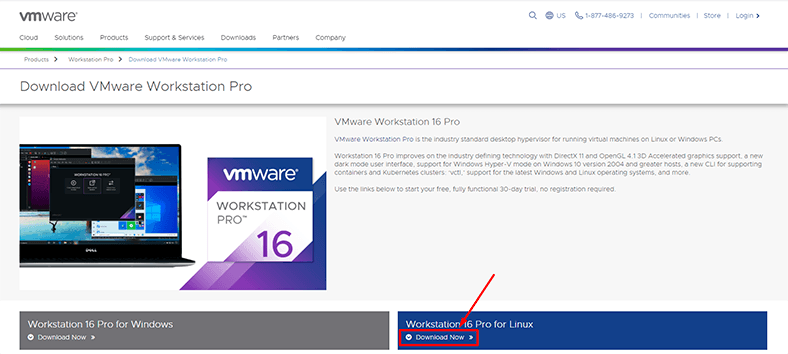
To install VMware, download the installation file. You can find the latest stable verison on its official website.
https://www.vmware.com/products/workstation-pro/workstation-pro-evaluation.html
We need a version for Linux.
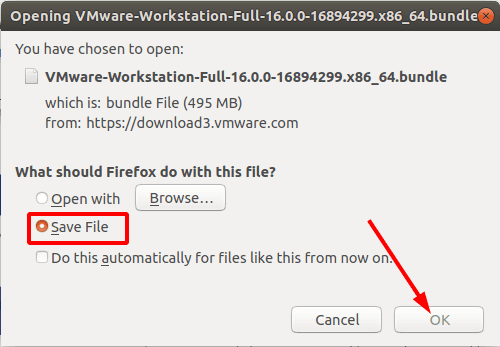
Select to save the file and wait until it is downloaded.
Also, you have to add such components as GNU Complier Collection and Build Essential, required to install VMware.
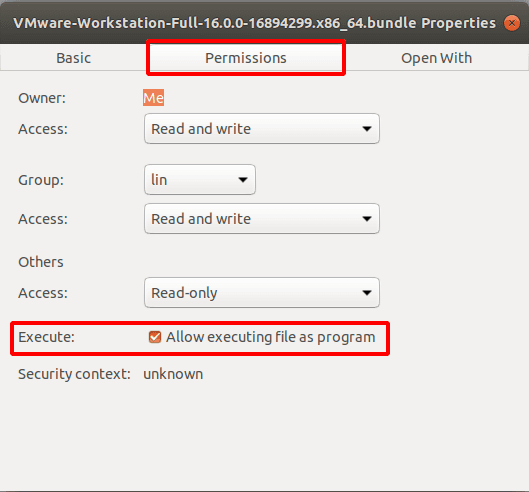
You need to set permissions for the downloaded file. Right-click on the file you need and open Properties.

Jump to the tab Permissions and check the box for Allow executing file as program.
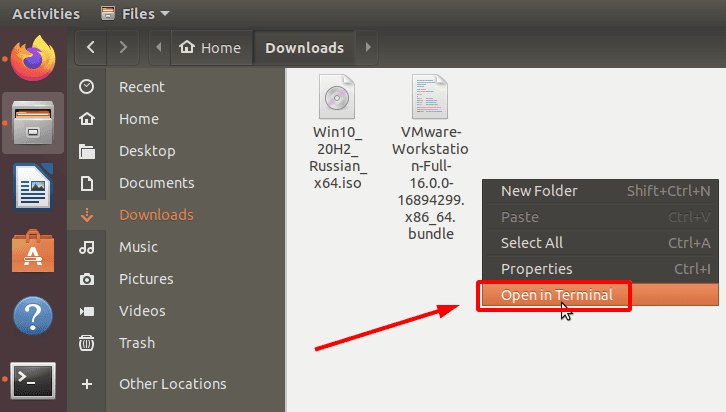
Go to the downloads folder and run the Terminal from there. Do it by right-clicking on an empty area in the folder and selectingOpen in Terminal.
Before installing any software, you need to update the package repository with the following command.
sudo apt update

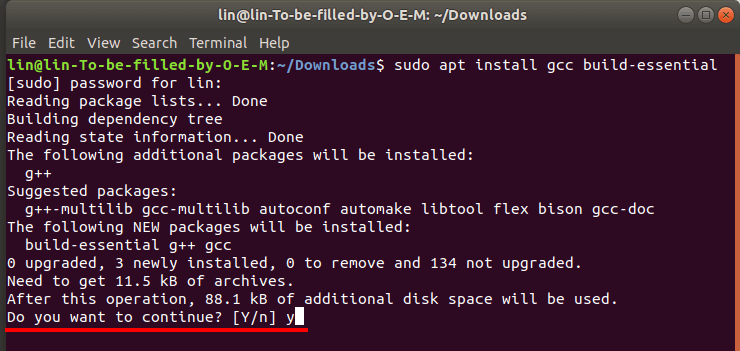
After that, install the required components, GNU Complier Collection and Build Essential, that will be used for VMware installation. Here is the command to use:
sudo apt install gcc build-essential

Hit Yes to confirm your action, and then Enter.
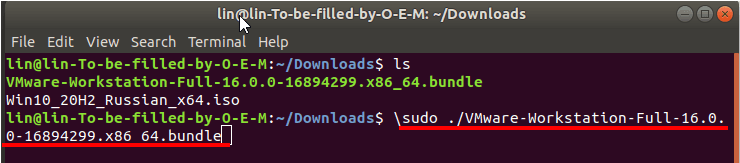
For further actions, you need the full name of the VMware package file.
For this purpose, list the files in your downloads folder with the following command:
ls

Copy the full name of the downloaded file. You’ll need it to extract the files from the package.
In the Terminal, type
sudo ./
and paste the package name.
This is how the command looks like.
Enter.
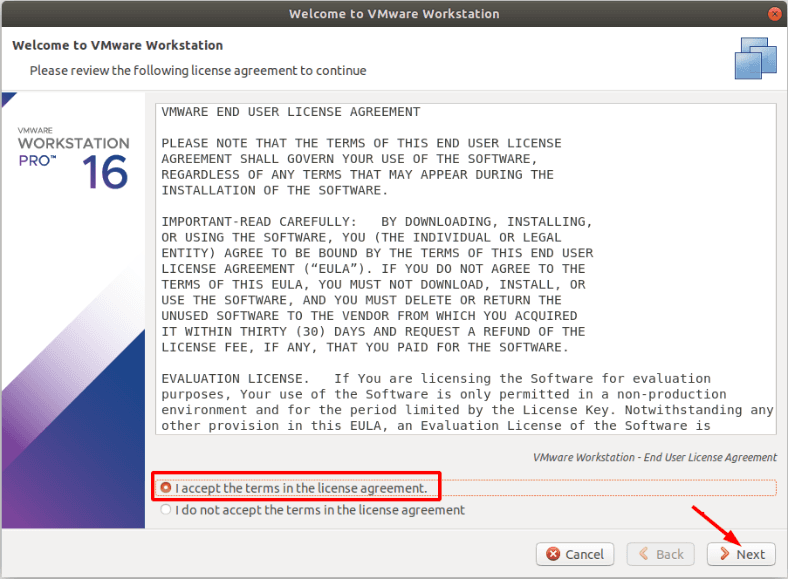
When the files are extracted, the VMware installation window should appear. If it doesn’t, go to the list of installed applications and launch it from there.

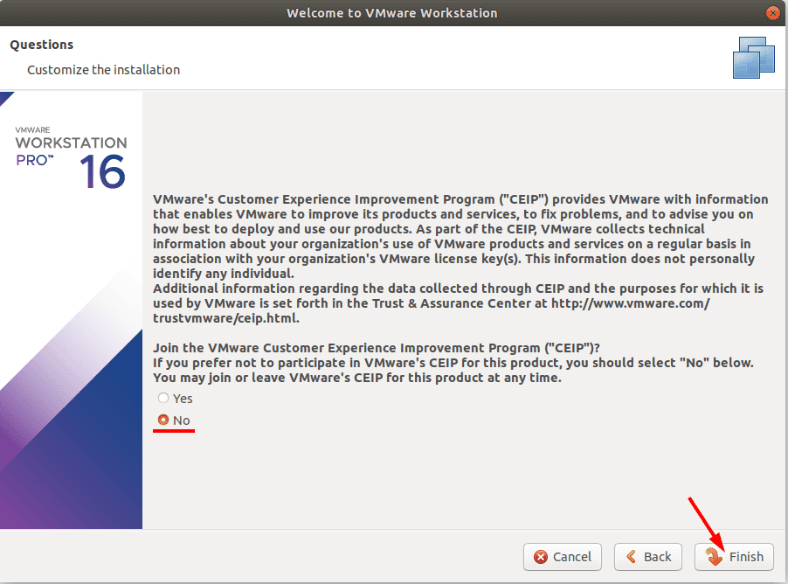
When it starts, select the configuration settings and proceed with the installation. Accept the license agreement.
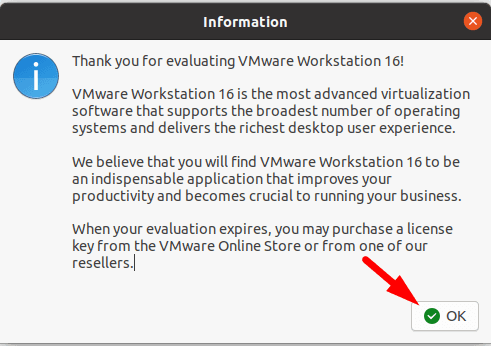
When it’s over, you’ll see the corresponding notification about it.
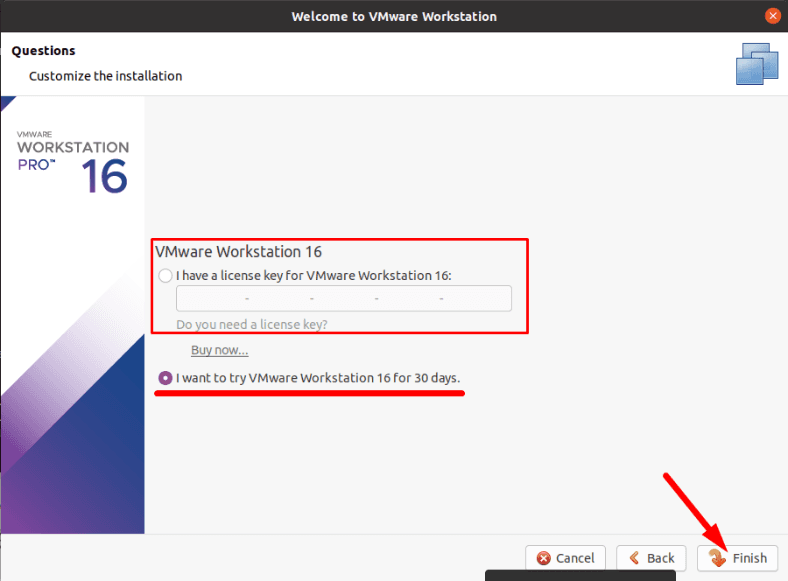
When started for the first time, the program asks you to enter a license key, but we choose free trial for 30 days.
Now that the program is installed, you can create a virtual machine.
How to create a virtual machine with Windows 10
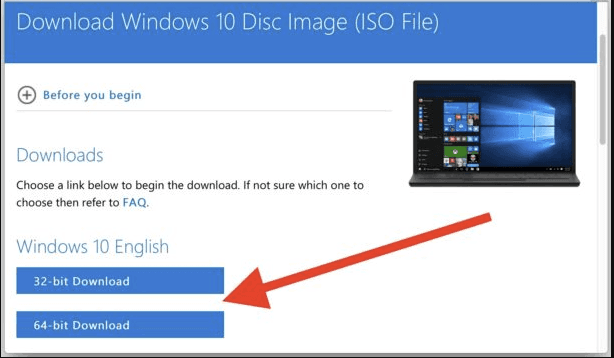
To create a virtual machine with a specific operating system, you have to download an image of such system first. Go to the Microsoft website and download the ISO file of the version you need.
After the image is downloaded, start VMware as a superuser (or root). For this purpose, exit the program and enter the following command in the terminal:
sudo VMware

This will help you to avoid possible issues when connecting a physical disk at a later time.
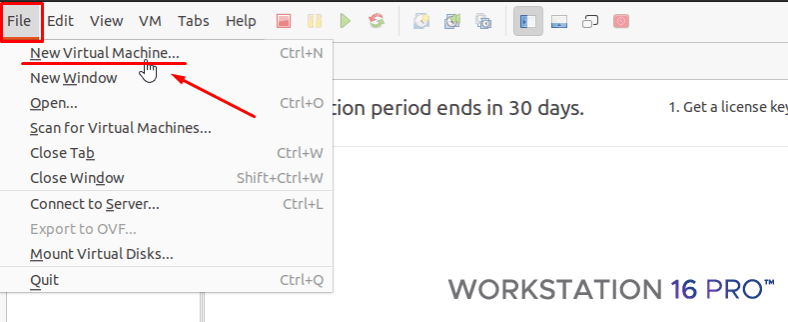
In the program’s window that opens click on the tab File – New Virtual Machine.
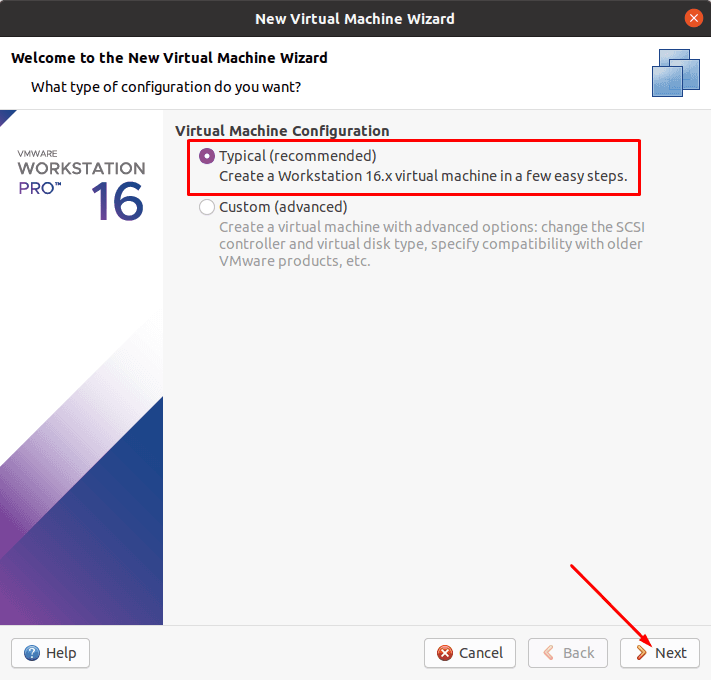
Select Typical configuration – Next.
Check the box for Installer disc image file (iso)

and specify the path to the downloaded image of the Windows operating system.

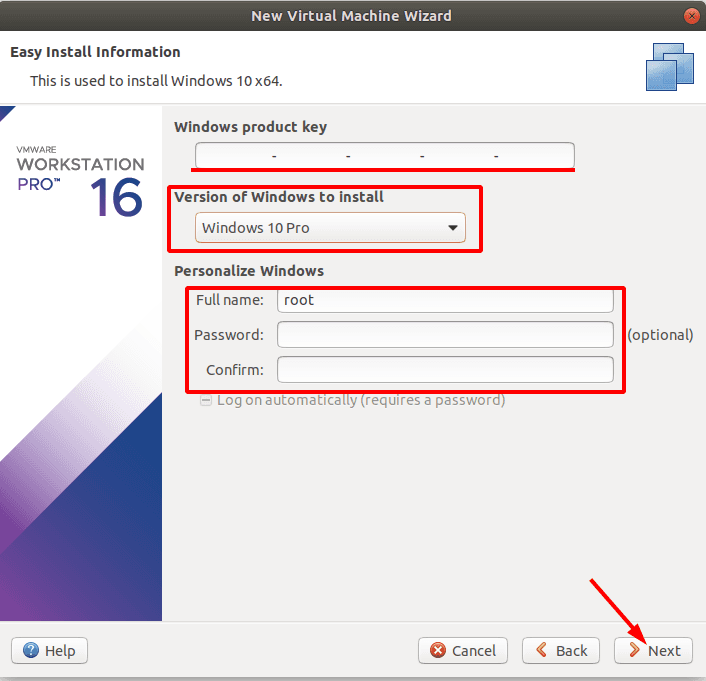
If you have the license key, type it and specify the version of Windows, set the username and password. If you don’t have the key, leave this field blank and click Next.
Set the name of the virtual machine, and change its location if necessary.
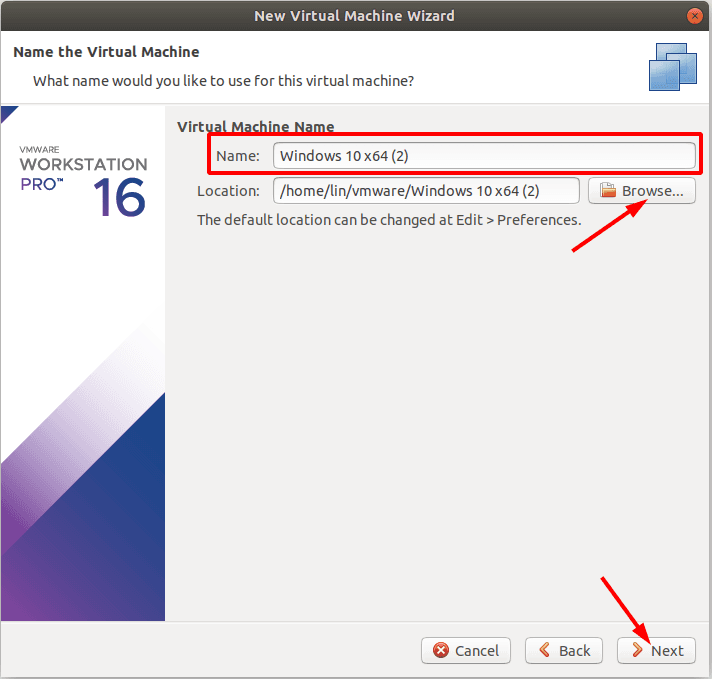
If you are going to recover data from the system disk, it’s better to choose a different disk for installation, because otherwise this process may overwrite the data you are trying to restore.
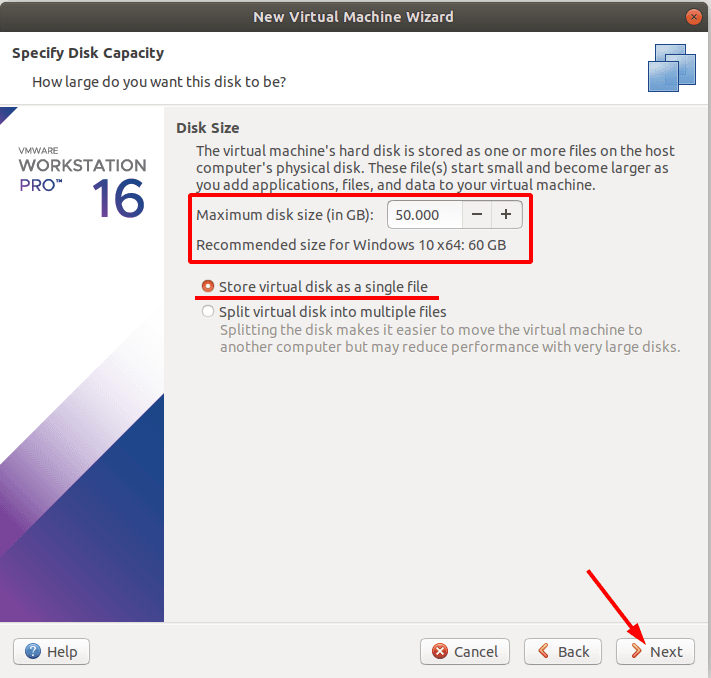
In the next window, you can set the virtual machine disk size. Here, you can set the virtual machine disk size, check the box next to Store virtual disk as a single file and click Next.
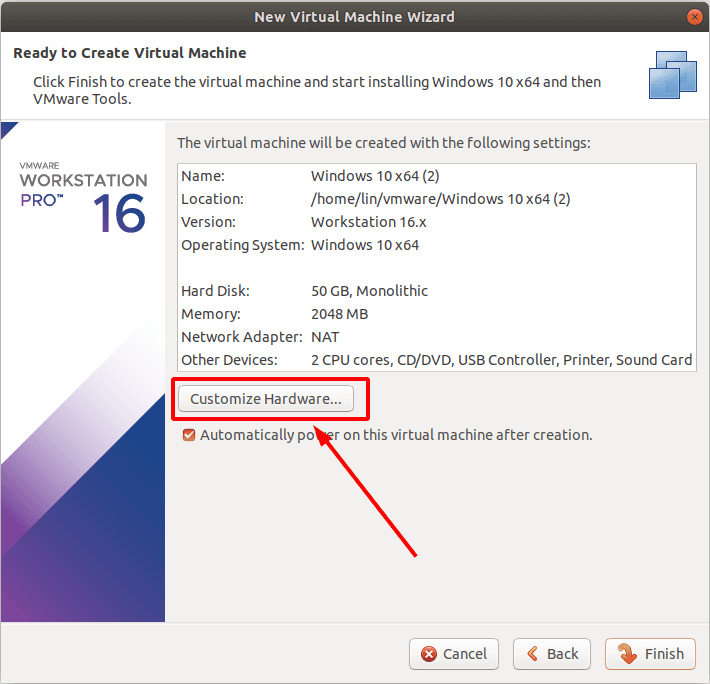
In the next window, you can access virtual machine settings.
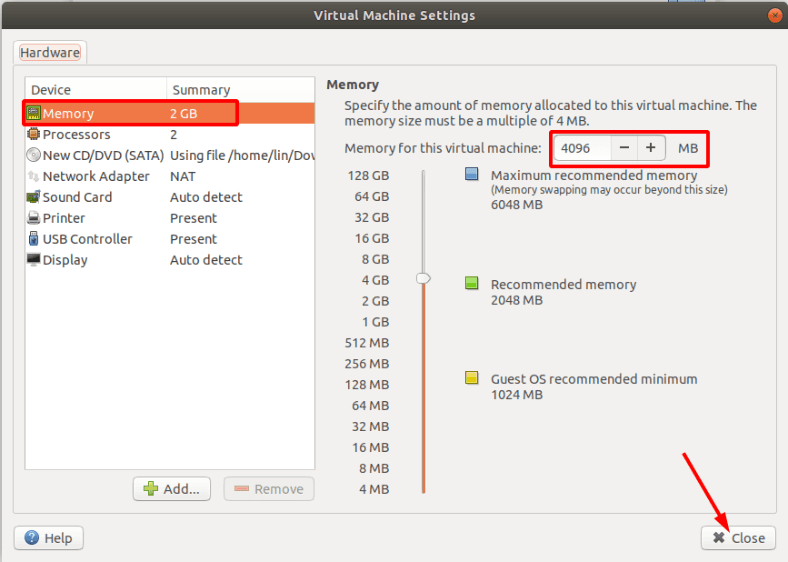
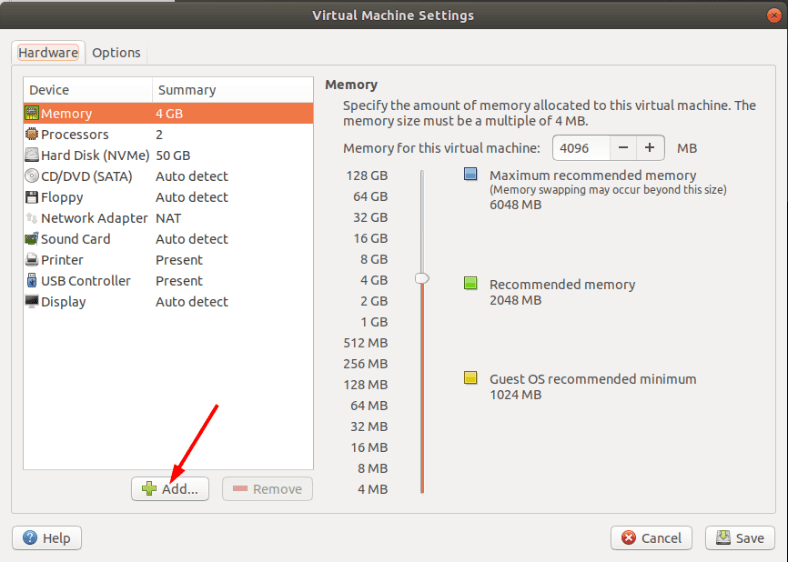
In the first line, choose the amount of system memory to be allocated for this machine. Of course, the more is the better, but you have to consider how much RAM is installed on your PC: if you assign most of it to the needs of the virtual machine, your real computer may freeze.
Other settings are not as important at the moment, so click Close and Finish to complete the configuration process.
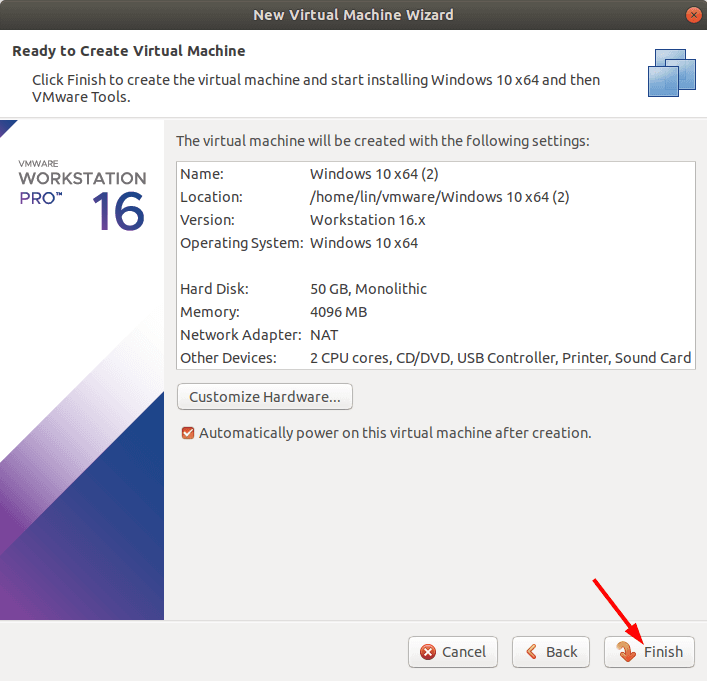
Now the virtual machine is ready: the last step is to launch it and install the operating system.
The installation begins as soon as you launch the machine: in this case, it follows the same procedure as if you were installing Windows on an ordinary computer. Just follow the directions and wait until all elements are installed.
How to add a physical disk to the virtual machine
Now, use the virtual machine settings to add the physical disk from where you want to recover data. To make sure your machine will boot from the hard disk, and will not start the installation every time you launch it, uncheck one of the options in the CD/DVD tab.
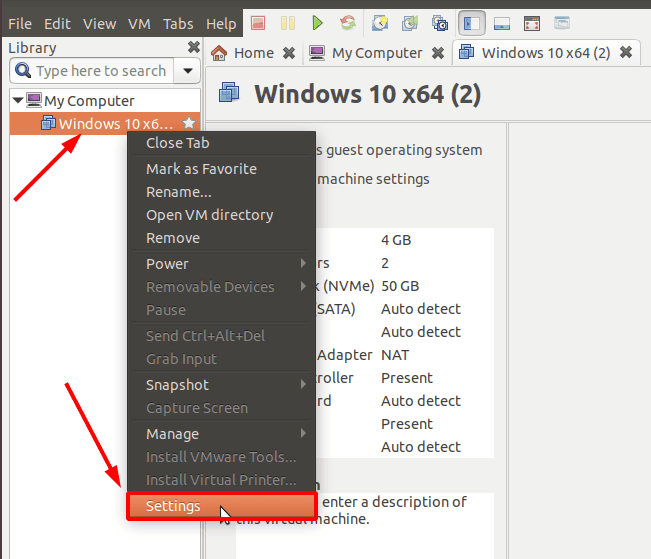
Right-click on the virtual machine to open Settings.
In the option for CD/DVD, uncheck this box.
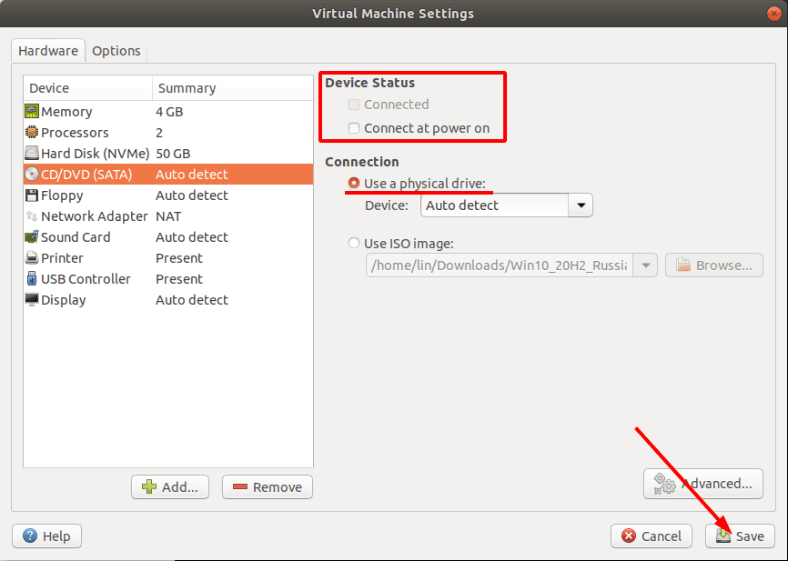
Below, click Add
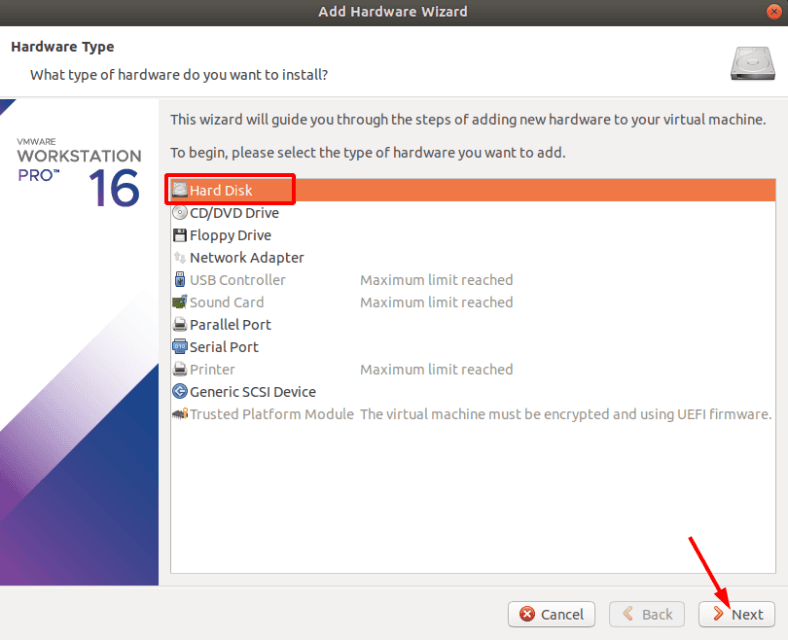
Select a hard disk and click Next.
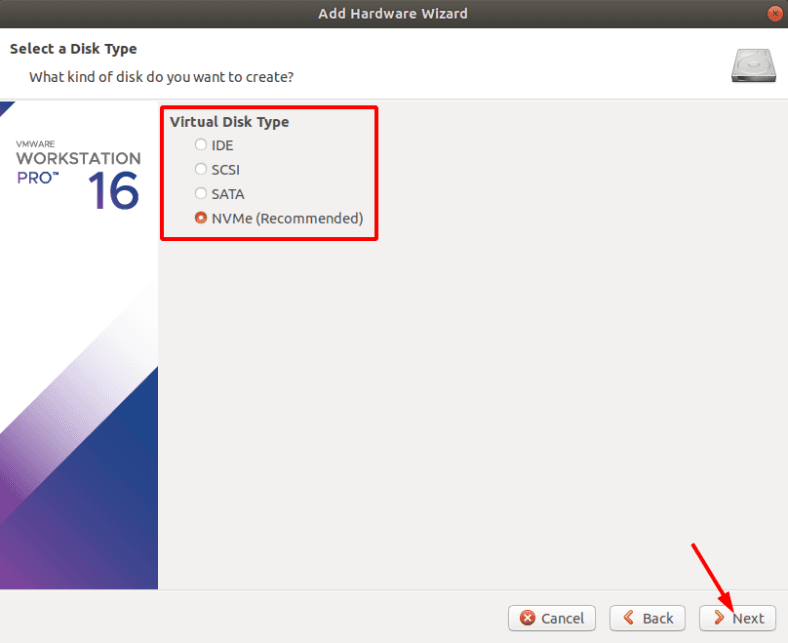
Specify the disk type as recommended.
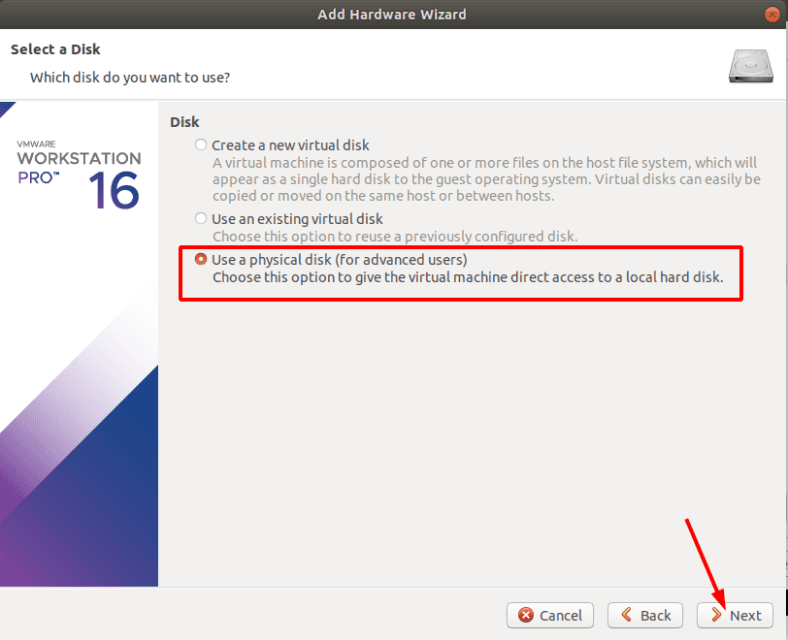
In the selection window, check the box for Use a physical disk and click Next.
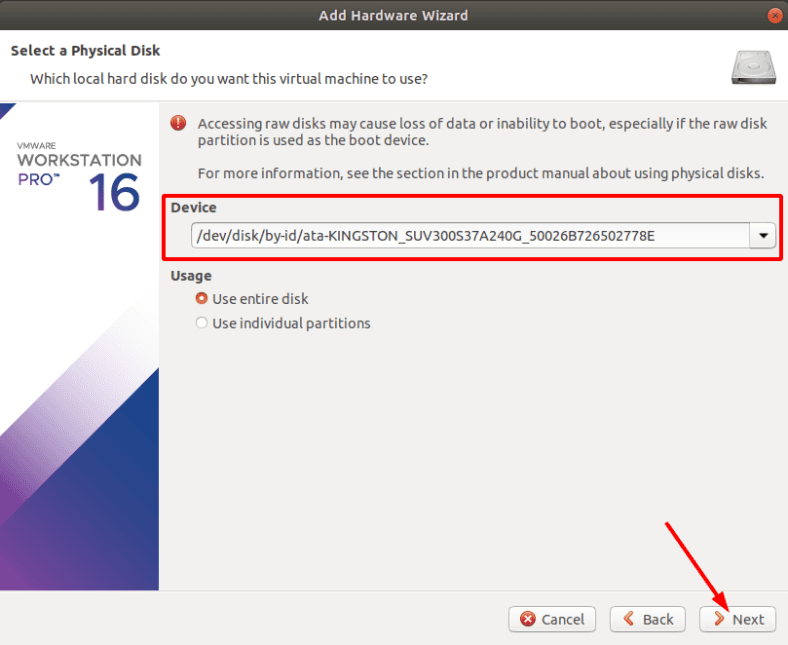
From the drop-down list, select the device that the data was lost from.
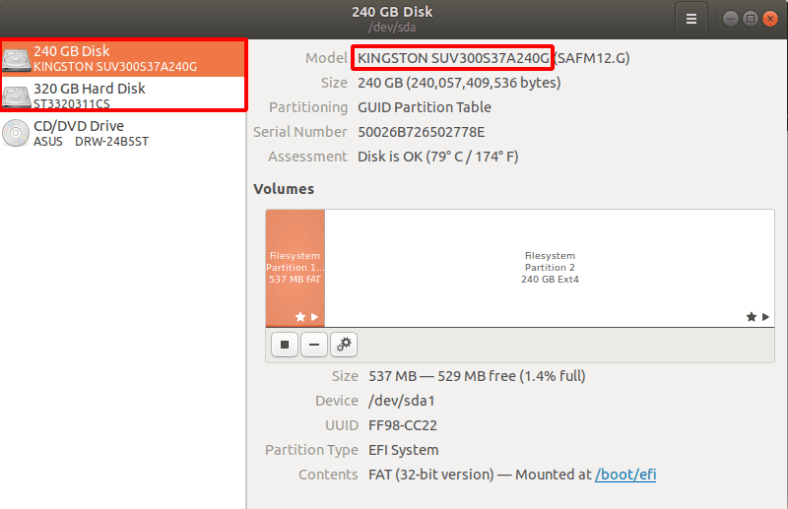
If you find it difficult to understand which disk you need, open the Disk Utility. Here, you can find the disk you need by its name or size.
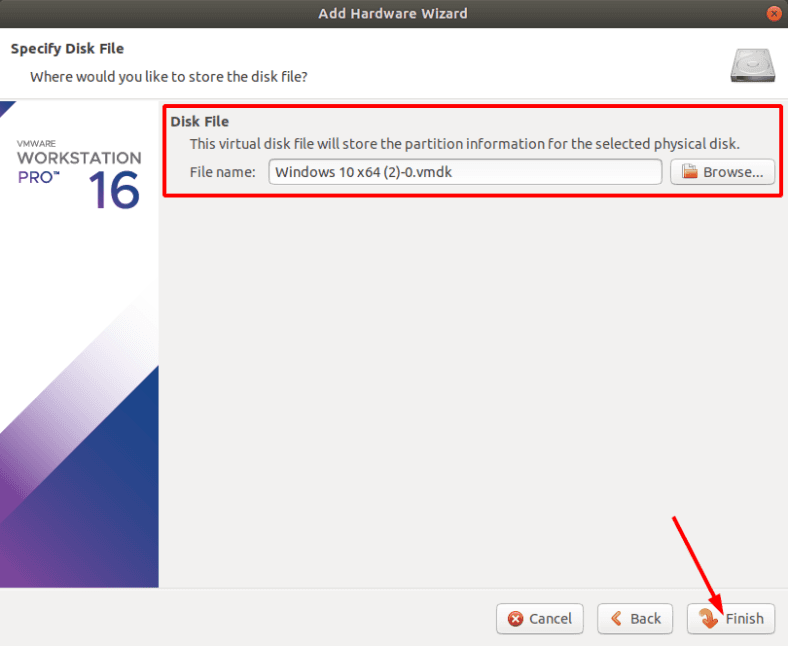
Select the disk and click Next, then hit Finish to complete this step.
Now start the virtual machine and wait until the operating system boots.
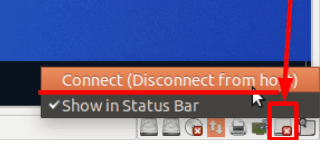
To connect a USB pen drive, plug it into your computer’s port, and in the VMware app below, enable it by clicking on the device and selecting Connect to host.
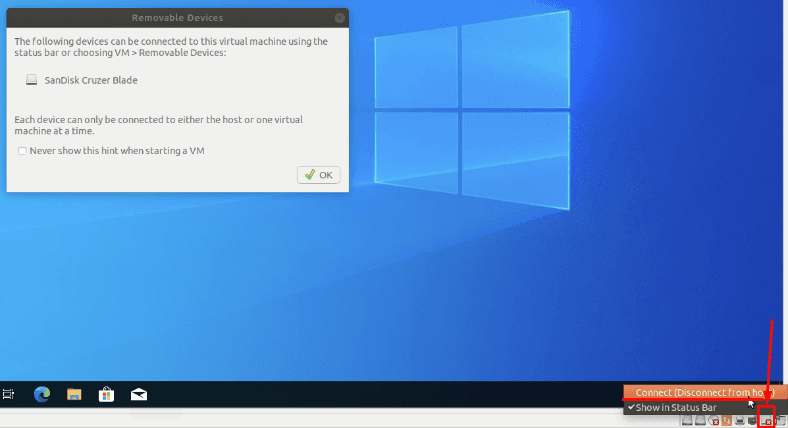
After that, it should be displayed in the data recovery program, too.


Best Linux Course Training Certification Online Class in Trichy Red Hat kernel 100% Exam Pass 100% Job Support 100% Practical
