On your Mac system, whatever might be the storage, you will frequently face memory issues. To create more space on your Mac, it's necessary to compress videos on Mac using professional tools. The following part discusses the Best video compressors for Mac.
The easiest way to compress videos on Mac in batch and no quality loss.
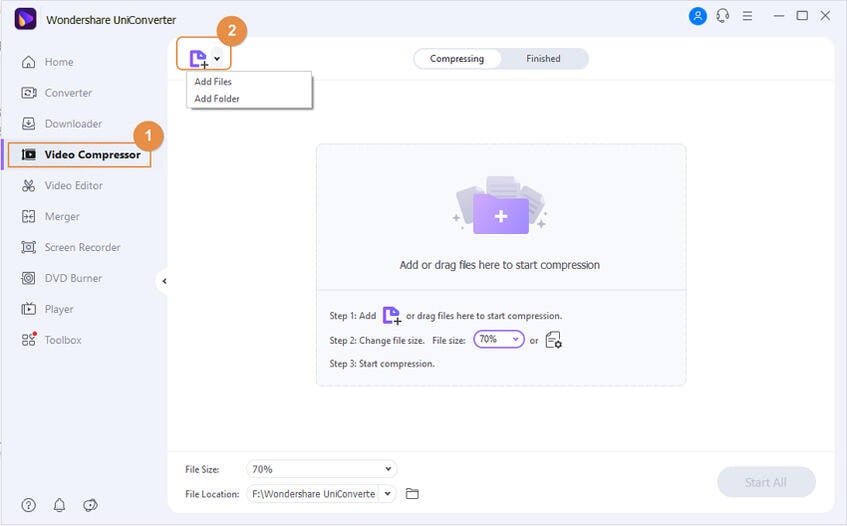
Step 1 Launch the best video compressor for Mac and add files.
After downloading and installing Wondershare UniConverter on your Mac, open the program. From the Video Compressor tab, click the icon to add files.

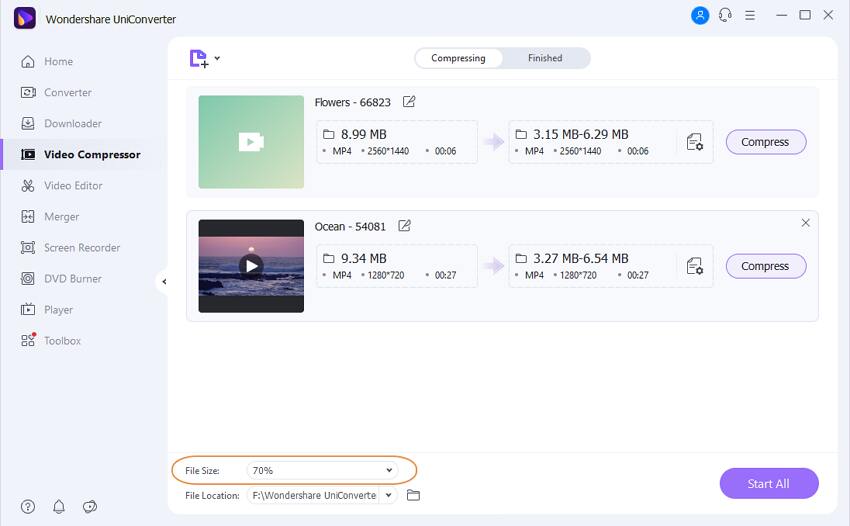
Step 2 Settings for batch compression.
If you want to compress all videos by one click, click the Reduce File Size button to choose the size that you need to compress.

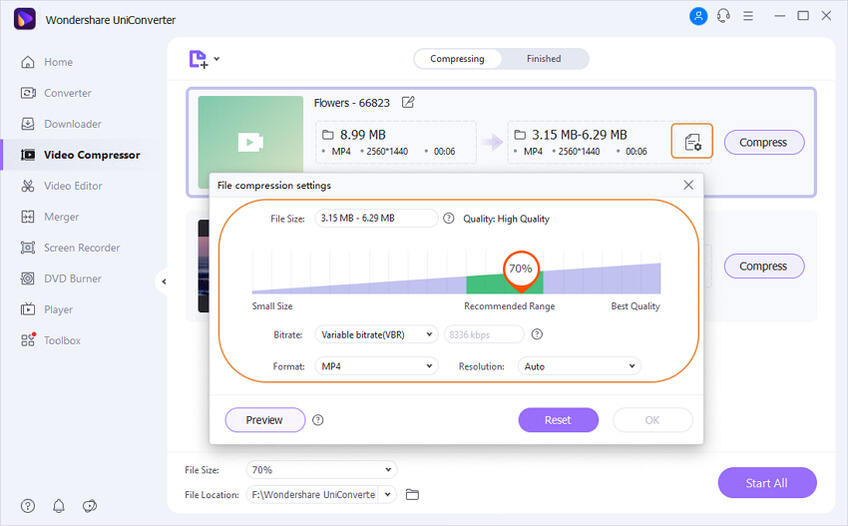
Tips: The step above can change all added files settings for batch compression. If you want to customize the video compression settings separately, click the Setting icon for each video file, and you'll get a small window to reduce video size. You can compress the video size by changing file size, video resolution, bitrate, output format, and more others.

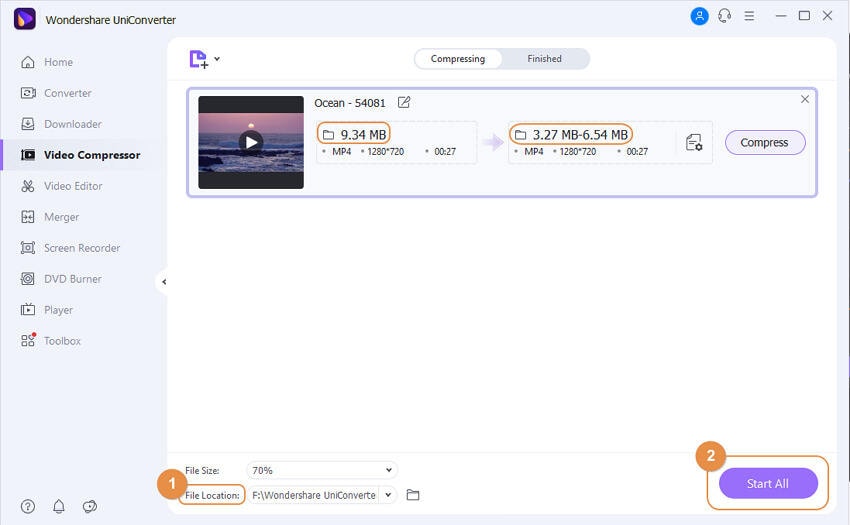
Step 3 Compress videos on Mac.
Now you can see the change in video size. If you're satisfied with the output video size, go to the File Location tab and select the location you want to save Mac's compressed video file. Finally, hit Start All to start compressing the video on Mac.


