


No, SearchApp.exe is not a virus. It's a process that is part of Windows Search and helps you search files on your computer. However, cybercriminals can create malware programs with the name of a legitimate SearchApp process to hide the malware.
How do I turn off SearchApp?
There are two ways to disable SearchApp.exe, they are.
- Using Task Manager
- Using Command Prompt.
Let us talk about them in detail.
1] Using Task Manager
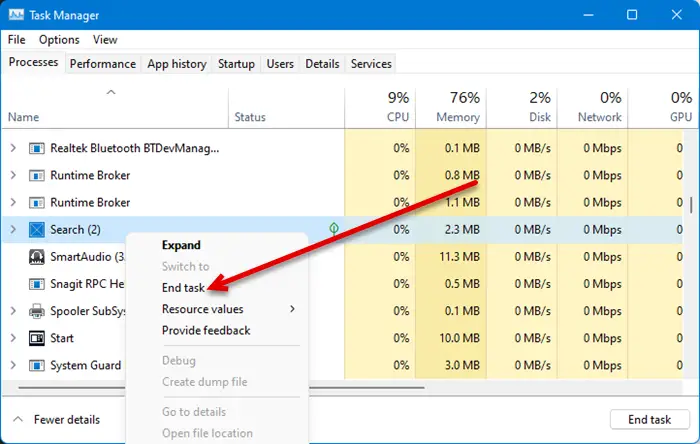
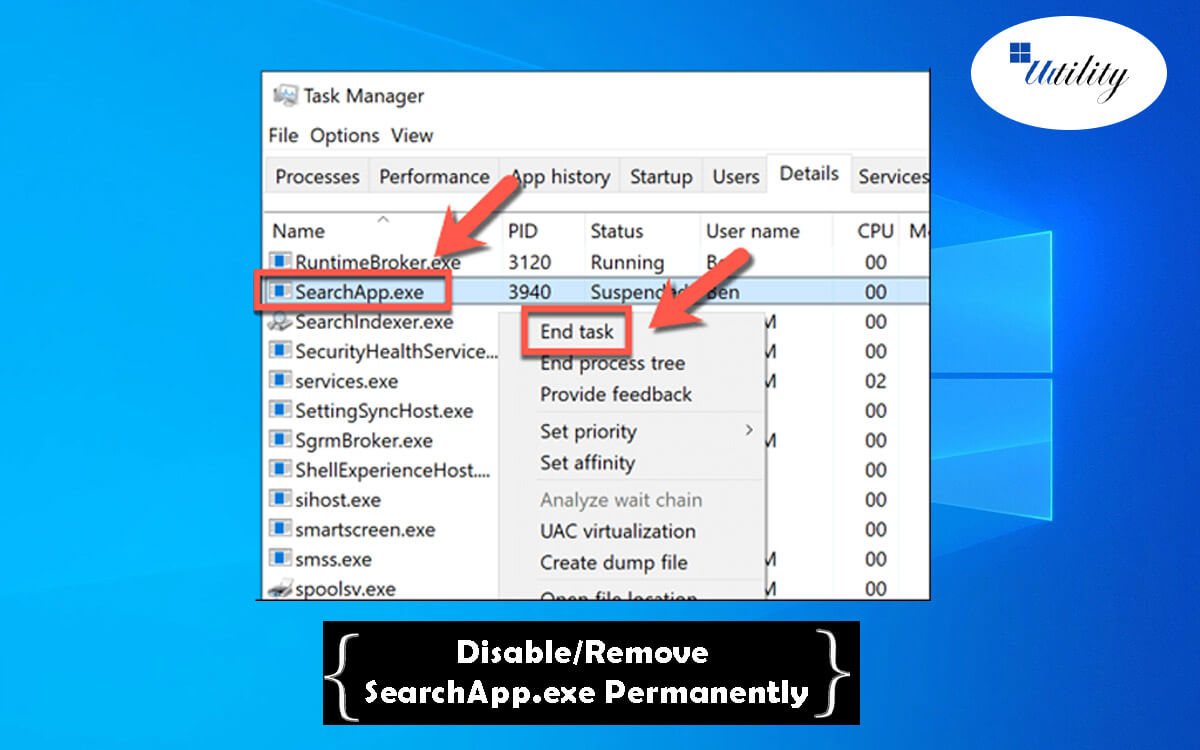
The first method is pretty simple and if you are experiencing high CPU usage, then this can also resolve the issue. So, open Task Manager by searching it out of the Start Menu or by Ctrl + Shift + Esc. Then look for Search or SearchApp.exe, right-click on them and select End Task.
Finally, restart your system and check if the issue persists.
2] Using Command Prompt
A lot of users were able to resolve the high CPU usage issue caused by SearchApp by executing some cmd commands. We are going to do the same. Open Command Prompt as an administrator by searching it out of the Start Menu.
Then, execute the following commands one after the other.
cd %windir%\SystemApps
taskkill /f /im SearchApp.exe
move Microsoft.Windows.Search_cw5n1h2txyewy Microsoft.Windows.Search_cw5n1h2txyewy.old
Once you are done with that, restart your computer and the process will be disabled temporarily resolving the issue in question.

How to Turn Off Windows DefenderWindows Defender is an antivirus program that comes pre-build with Windows 10.
Earlier everyone suggests you to have an alternate Antivirus software then what has to Windows offer.
With the release of Windows 10, Microsoft has well improved their Antivirus mechanism (Windows Defender).
But still some prefer to go for third party Antivirus software like Kaspersky, McAfee or Avira etc.In some situation you want temporarily or permanently disable the Windows Defender on your Windows 10.
Well, Turning off Windows Defender in Windows 10 is very easy by following this blog you can do it in just 1 mins.How to Disable Windows Defender in Windows 10On your Windows 10 device follow the below instruction to disable Windows Defender.
*Press Windows Key on your Keyboard*Select Setting in the options*On the Settings Page Select Update & Security*Now Select Windows Security*Open Virus & threat protection*Now click Manage Setting on the Virtus & threat protection Settings.
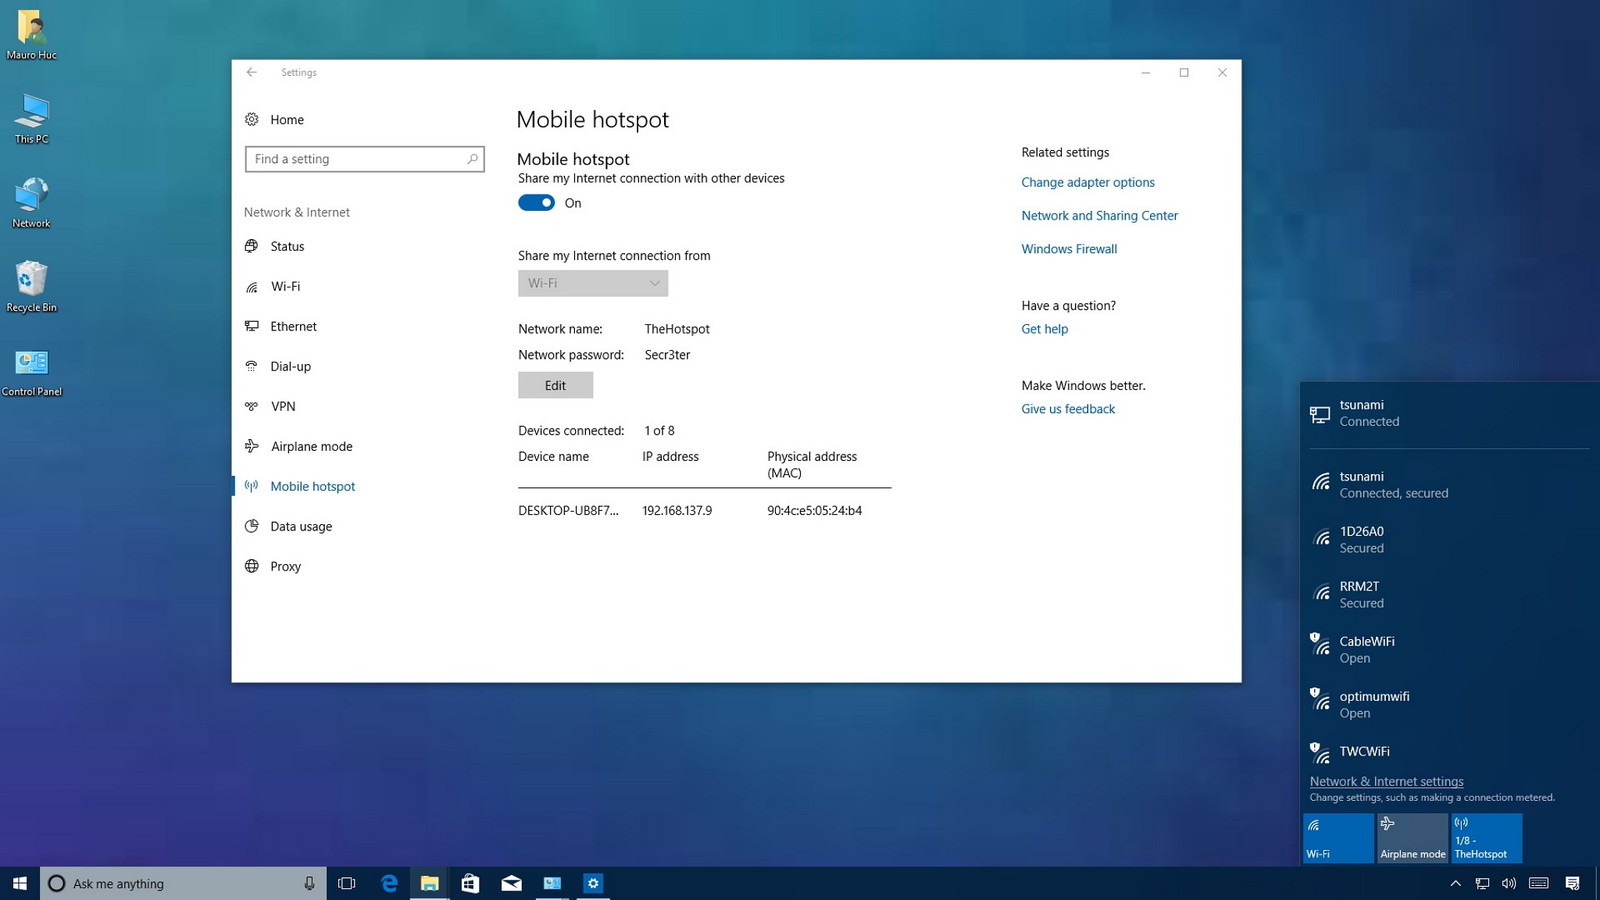
Personal Hotspot is one of the most common features that we find in almost all the smart devices.
Well, using this feature on smartphones follows a much different pattern as using it on the computer systems.
And today, most of the modern operating systems come along with this functionality.
One such operating system is Windows 10.
Windows 10 operating system provides you with this feature that allows you to turn your device into a Wi-Fi hotspot for sharing the internet connection with other devices.
If that is the situation, then now, there is no need to go anywhere.
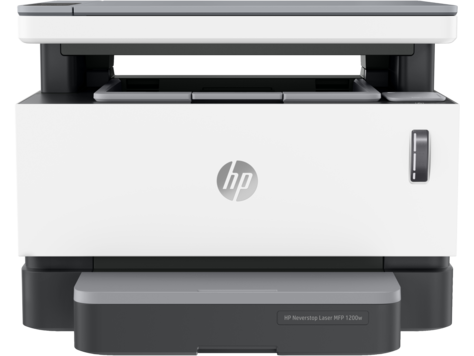
HP Neverstop Laser MFP 1200w Driver Download free for Windows 10, 8, Win 7, XP, Vista.
This software includes a complete set of drivers, the latest software, the installer method, optional software, and firmware.Full-featured software and drivers for the HP Printer Series have everything you need to install and use your canon printer.This site also contains printer drivers for all HP Laser and other printer drivers also on this site.
You only need to choose the type that is suitable for the printer you are using.Download the latest drivers for your HP products all by downloading the file below.
You will have the latest printer drivers in just a few seconds.HP Neverstop Laser MFP 1200w Printer Driver SetupOn this website, there are various brands of drivers so make sure you don't choose the wrong choice when downloading the driver.You find the driver software that matches your printer type and please download it.Drivers that are downloaded are usually in the form of a WinRAR file.Right-click the file and then click Extract Here so that the file can also beextracted in that folder.Look for the setup file with the extension EXE.
Double click the file to start the installation process.Just follow every instruction that appears on the computer screen until it's finished.The last stage of the installation is usually asked to restart the computer so that the driver software is installed correctly.After the computer has restarted, connect the printer to your computer using the default cable to check if the driver is installed.HP Neverstop Laser MFP 1200w Driver Setup for Mac OSOpen the MAC printer folder to run the installer of the printer driver package.
If the user receives a notification, click on 'Accept' to continue.In the Warning dialog box, click on 'Continue' and again 'Continue' in the printer driver window to start the installation program.On the 'Introduction and Read me' dialog box 'click' Continue 'and also' according to 'to the terms of use.Close all applications and in the Warning Notification dialog, click 'Continue'.Select the places to install the printer driver and click again 'Continue'.Now select the installation type and click on 'Continue'.While you were asked to start the installation, click on 'Close' once completed.Click on 'Print and scan' now and the printer list will be displayed.You can restart the computer to complete the installation.Identification of the problem using the Device ManagerIf HP drivers are outdated, corrupt, or missing, this information will be listed in the Device Manager.
Windows 10 is an efficient OS; however, there are times when you can face issues like a frozen or stuck screen.
The issue is an annoying one and if you are facing the same problems, then you are on the right spot.
To know about how to fix stuck, slow or frozen login screen problems, follow the given directions to fix such problems.Boot in Safe ModeThe computer will start with limited files and drivers in Safe mode.
In case you intend to start your computer in Safe Mode, then go through the below-mentioned steps:Tap on the Start button.Click on Settings.Choose Update and Security.Choose Recovery.Select Advanced startup.Tap Restart now.Choose Troubleshoot from the Choose an Options section.Then select Advanced options.Click Startup Settings.Then choose Restart.The options will become visible, as computer restarts.Select 4 or F4 to start your computer in Safe Mode.Quickly restart the computer in Safe ModeIf the user wants to restart the computer in Safe Mode, then abide by the given steps.Go to Choose an options section.Click on Troubleshoot.Choose Advanced options.Select the Startup Settings.Click on Restart.As your computer restarts, a list of options will appear.Select 4 or F4 to start your computer in Safe Mode.Perform a Clean BootHow to Perform a Clean BootPerforming a clean boot reduces conflict related to software that can cause problems.
These issues can be caused by services and applications running in the background when you start Windows.How to perform a clean bootFind the search box.Input msconfig.Choose System Configuration.Go to Services tab.Choose Hide all Microsoft services box.Select Disable all.Then go to the Startup tab.Select Open Task Manager.Close Task Manager.Then tap, OK.Reboot your computer.Temporarily Turn off Antivirus FirewallsMost of the time, having multiple antiviruses, firewall or anti-malware programs may sometimes prevent the user from performing a specific task on the computer.If this is the cause of the issue, then temporarily turn them off while still in Safe mode and try again to log in.Have a LookHow to Fix Kernel-Power 41 Error on Windows 10?How to manually reset Windows Updates componentsIf you wish to manually reset Windows Updates components, then pursue the given instructions:Right-click on Start.Choose Command Prompt.Tap on Yes when asked for permissions.Stop BITS, Cryptographic, MSI Installer and Windows Update Services by typing commands:net stop wuauservnet stop cryptSvcnet stop bitsnet stop msiserverClick Enter after every command.Rename the Software Distribution and Catroot2 folder by typing the commands and click Enter after each command:Ren C:\ \software\Distribution\WindowsSoftwareDistribution.oldRen C:\ catroot2 Catroot2.old\Windows\System32Restart BITS, Cryptographic, MSI Installer and Windows Update Services by typing the commands:net stop wuauservnet stop cryptSvcnet stop bitsnet stop msiserverInput Exit in the command prompt.How to change registry settingsIn case you intend to modify registry settings, go through the below-mentioned steps:Right-click on Start.Choose Run.Input regedit.Click Enter.Go to HKEY_CURRENT_USER\SOFTWARE\Policies\Microsoft\Windows\Current Version\Push Notifications.Then you will see NoToastApplicationNotification.Double-tap on it.Change its value from 1 to 0.Tap OK.Sign out and sign in again.How to Check Event ViewerIf you want to check the Event Viewer, then abide by the given steps:Right-click on Start.Choose the Event Viewer.Expand Windows Logs.Select the Application Log.Highlights the event in the log and scroll down.The user may see logs with yellow warnings or red errors.
If you see a red error, double click on it and copy the content to a document.How to Run System Maintenance troubleshooterFollow the provided steps to Run System Maintenance troubleshooter:Tap Start.Go to search field box and type Troubleshooting.Tap on Troubleshooting.Tap on System and Security.Select System Maintenance.Tap NextSteps to run the system maintenance troubleshooter.How to perform Automatic RepairIf you want to perform Automatic Repair, then you can follow the provided steps:Place in the Windows installation disk or USB drive.Then restart the computer.The user will see the message request reads select any key to boot from DVD.Select any key to boot.When the Install Windows page appears, choose to Repair your computer to start the Windows Recovery Environment.In WinRE, go to Choose an options section.Select Troubleshoot.Select Advanced Options.Select Automatic Repair.How to Run Microsoft Safety ScannerGo through the given instructions to Run Microsoft Safety Scanner:Download the tool.Open and select the type of scan you desire to run.Start the scan.Review scan results on the screen.How to Run a System File CheckerTap Start.Go to Search field box and type CMD.Choose Command Prompt.Click on the right and choose Run as Administrator.Type sfc/scannow.Then tap Enter.Restart the computer.
QuickBooks Sync Manager lets you sync your company files with third-party apps.
However, syncing the files with a third-party app may bring errors due to which you may need to turn off the sync manager service.
To find out how to disable QuickBooks Sync Manager, carry out these instructions: From the Windows Taskbar, locate the Intuit Sync Manager service.Click right on the sync manager to view the syncing company files.Select the Sync Enabled button.Choose the Disable button using the drop-down arrow.To clear the Sync settings, you can press the Help menu.Select the Manage Data Sync option.Click the Clear Sync Settings button.Press Yes to confirm the action.
To avoid any kind of problems in the future, you can remove the QuickBooks Sync Manager as well.

If your Facebook account was disabled volitionally by you, you can reactivate it by logging in.
If your account was disabled by Facebook, and to know how can I recover my disabled Facebook Id or Account.
However, you'll need to submit an appeal to get your account back; depending on the circumstances of the disabling, they may or may not grant your request.
And to reach a customer service agent of Facebook customers need to dial 18885890539 toll-free number USA.