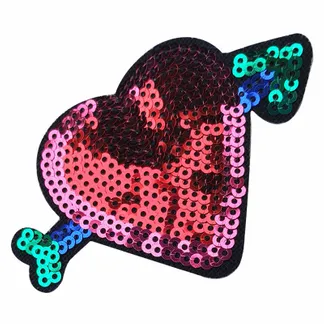
DIY Patch Making
Custom patches have become increasingly popular in recent years, allowing individuals and organizations to showcase their unique style and identity. Whether you're a fashion enthusiast, a member of a club or organization, or simply someone who loves personalized accessories, creating your own custom patches can be a fun and rewarding experience. In this ultimate guide, we will take you through the step-by-step process of DIY patch making, from designing to sewing. So, let's dive in and discover the art of custom patch making!
Custom Patch Designs
Before you embark on your DIY patch making journey, it's essential to have a clear vision of the patch design you want to create. Custom patches can be made in various shapes, sizes, and styles, so it's crucial to determine the purpose and aesthetics of your patch. Here are some key considerations when designing your custom patches:
1. Purpose
Think about the purpose of your patch and what message or symbol you want it to represent. Are you creating a patch to commemorate a special event, promote your brand, or display your interests? Understanding the purpose will guide your design choices and ensure that your patch effectively communicates your intended message.
2. Shape and Size
Consider the shape and size of your patch. Round, rectangular, square, or custom-shaped patches all have their own unique appeal. Additionally, think about where you plan to attach the patch – whether it's on a jacket, backpack, or hat – as this will impact the optimal size for your design.

3. Colors and Fonts
Selecting the right colors and fonts is crucial in conveying the desired aesthetic and tone of your patch. Vibrant colors can make a patch pop, while muted tones create a more subtle look. Similarly, bold and playful fonts may suit a fun and casual design, while elegant and sophisticated fonts can elevate a patch's overall appearance.
4. Symbols and Images
If you're incorporating symbols or images into your patch design, choose ones that align with your intended message or theme. Icons, logos, and illustrations can enhance the visual impact of your patch and make it instantly recognizable.
Custom Embroidered Patches
One popular method of creating custom patches is through embroidery. Embroidered patches have a classic and timeless aesthetic, and the textured threads can add depth and dimension to your design. Here's a step-by-step guide on how to make custom embroidered patches:
Step 1: Gather Your Materials
Before you begin, make sure you have all the necessary materials: fabric (preferably a sturdy material like twill), embroidery threads, embroidery hoop, embroidery needles, water-soluble fabric marker or pencil, and scissors. Having everything prepared will ensure a smooth patch-making process.

Step 2: Design Your Patch
Using the design considerations mentioned earlier, sketch your patch design on a paper or use graphic design software to create a digital version. This will serve as your guide throughout the embroidery process.
Step 3: Transfer the Design to Fabric
Once you have your design ready, transfer it onto the fabric using a water-soluble fabric marker or pencil. Ensure that the design is centered and proportionate on the fabric.
Step 4: Hoop the Fabric
Place the fabric in the embroidery hoop, ensuring that it is taut and stretched. This will provide stability and an even surface for the embroidery process.
Step 5: Thread the Needle
Select your embroidery thread colors and thread the needle. Double threading can provide a more secure stitch, preventing the thread from coming loose. Be sure to tie a knot at the end of the thread.
Step 6: Start Embroidering
Begin embroidering your design, starting from the center and working outwards. Use different stitching techniques like running stitch, satin stitch, or backstitch to bring your design to life. Take your time and ensure each stitch is secure.
Step 7: Finishing Touches
Once you have completed your embroidered design, remove the fabric from the hoop and carefully cut around the design, leaving a border of fabric. This will prevent fraying and give your patch a clean finish.

Step 8: Attach the Patch
Finally, attach your custom embroidered patch to your desired item by either sewing it on or using fabric glue. Ensure that it is firmly secured, and you're ready to flaunt your unique creation!
It's important to note that custom patch making requires practice and patience. Don't be discouraged if your first attempt doesn't turn out exactly as planned. Experiment with different techniques, materials, and designs until you achieve the desired result. The beauty of DIY patch making lies in the ability to unleash your creativity and showcase your personal style.
Whether you choose to create custom patches for personal use or as a business venture, the possibilities are endless. Custom patches can serve as powerful branding tools for companies, meaningful tokens of appreciation for club members, or simply fun and expressive accessories for individuals. Whatever your purpose may be, embrace the art of custom patch making and enjoy the journey of transforming your ideas into tangible, wearable creations!


